Reserves - An Introduction
Please note if you have Scribelite Reserves are pre-set and linked to the cost codes for you and cannot be amended.
Following customer feedback requesting a more comprehensive way in which to manage reserves on Scribe we have added additional menu options related to managing reserves.
For new customers Reserves will automatically appear as a menu option. Users of Scribe with an account that existed prior to 2019/20 may not have this menu option - if it does not appear (between Budgeting and VAT in the menu) please contact us at [email protected] and ask us to add this for you.
Reserves can be set up within Scribe and linked to cost codes so that relevant payments and receipts are logged against the reserve balance. There is also the option to transfer money to and from reserves from the general fund. A report can be run to show the current reserves balances at any point.
For those working in Income & Expenditure the reserve figures shown on the balance sheet will come directly from this report, as opposed to requiring a manual entry for the correct figure (the previous approach).
Read this blog for a general overview of Earmarked Vs. General Reserves: What Every Clerk And RFO Should Know
How to Set Up Reserves in Scribe Accounts
Please note if you have Scribe Accounts Lite your Reserves will already be created and linked for you.
- Navigate to menu Setup → Reserves and click "Edit" icon in the top right corner.
- Add the name of the reserve, e.g. Sports Hall Refurbishment.
- Select the type of reserve - either Capital or Earmarked. This is how the reserve will be categorised on Scribe and how it will show on the Balance Sheet (if you are working in Income & Expenditure).
- Enter the 'Created On' date. This doesn't have to be the specific date but Scribe will use this date to denote whether or not the reserve should have an opening balance. If the reserve existed in the previous financial year ensure that a date before the 1st April of the current year is entered. Once entered an additional field titled Opening Reserve will show where the opening balance of the reserve should be entered. See here if you are working in Income & Expenditure.
- If the reserve is newly set up in the current financial year then use a date within the current financial year. An opening balance will not be required as either a transfer or a receipt transaction will move funds to the reserve.
- Add in any notes relating to the reserve. These will be reported on the Reserves Notes Report
- Files can be attached to the reserve record if required. Multiple files can be uploaded which could be any relevant information, e.g. quotes for work, schedules for projects etc. Click Upload, browse to the relevant document and select it. Repeat for any further files.
- Click Add to save the Reserve. Repeat this process to set up additional Reserves.
Reserves when working in Income & Expenditure
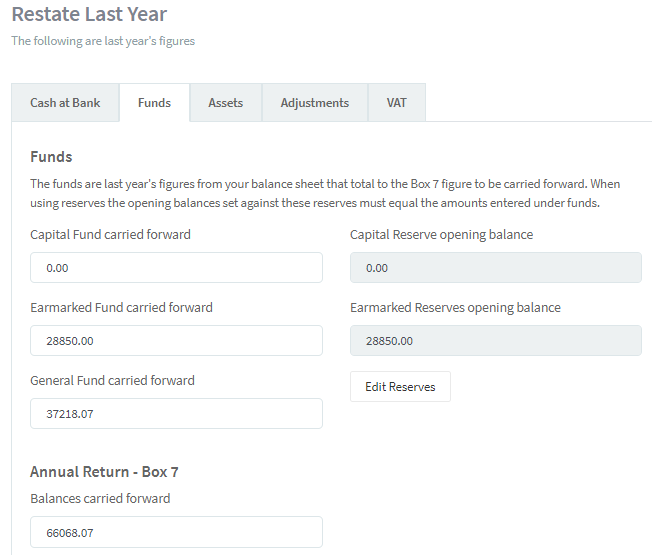
If your accounts are completed on an Income & Expenditure basis you must ensure that the reserves are set up with a total opening balance that matches the opening balances under Setup/Restate Last Year/Funds. This is so the Balance Sheet can calculate correctly at Year End.
If you have completed the previous financial year in Scribe these values will appear once you have closed and copied over the prior year. If you are a new Scribe user these opening balances should have been entered in as part of the initial setup.
The opening balances as copied over (existing Scribe users) or entered in (new Scribe users) appear on the left side of the screen. Both the Capital and Earmarked Funds must balance to the figures shown on the right which come directly from the reserves which have been set up.
If the amounts do not match then either amend the values on the left or click Edit Reserves to go to the setup screen to make the necessary corrections against the individual reserves.
Linking Reserves to Cost Codes in Scribe Accounts
In order to record money in and out of the reserve balance cost codes can be linked to the reserves. When a receipt or payment is entered against a cost code linked to a reserve the reserve balance will be amended accordingly.
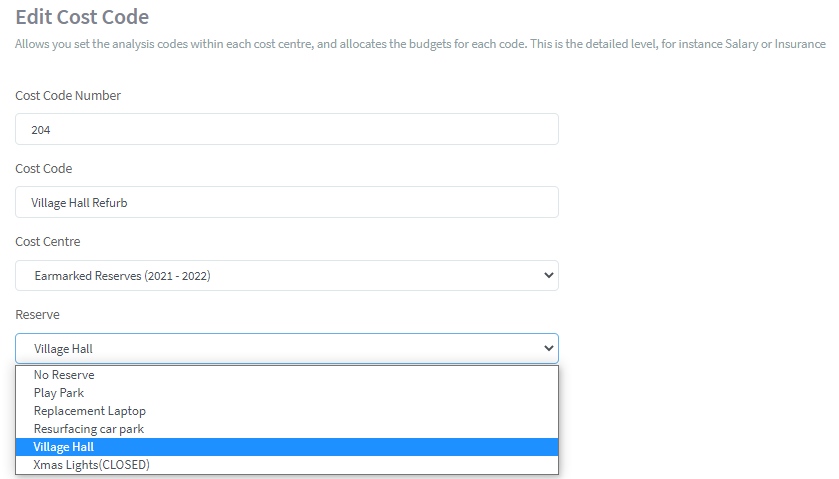
- Navigate to menu Setup → Cost Codes
- Locate a Cost Code that is relevant to Reserves (if you have not already done so it would be advisable to set up Cost Codes that relate to Reserves in order that you can manage them).
- Click into the relevant Cost Code. Within the setup screen of the Cost Code you will see an additional field titled Reserve. This is a drop-down menu that will show all the Reserves set up - select the Reserve relevant to the chosen Cost Code. Click Save at the bottom of the screen to update the record.
*Once a code is linked to a reserve all the transactions entered against that code will be shown against the reserve. If you have a code where transactions entered against it do not all relate to the reserve it is linked to then it would be necessary to set up an additional code so that one is linked to the reserve and one is not.
Budgets and Reserve Balances
The codes linked to reserves can have budgets allocated to them. To add budgets navigate to menu Setup → Reserves and enter a budget figure against the relevant code. There is no relationship on Scribe between the total reserve balance and the budget of the linked code(s). This is because the total reserve pot may be greater than the budget relevant to the current financial year. E.g. a reserve for Refurbishing the Village Hall has a total reserve balance of £30k but the budget relevant to this year is £5k for the work that will be carried out in this year. Therefore it is up to you to determine the budget figure you want to show against the linked code(s). It may be that it is equal to the total reserve pot if that particular project is anticipated to be completed within the financial year. For reserves that will straddle numerous financial years, it is recommended to enter the budgeted amount for that year in order to monitor the spend against that element of the reserve.
The budgets that you enter against cost codes will show on the Summary Report and make up the total budget for the year. The actual spend and income against these codes will also show on the Summary Report as this report shows what has happened within the current financial year. In order to see the overall position of your reserves it is necessary to use the Reserves Balance report.
Reserve Transfers
If a decision has been made to move money from the General Fund to a Reserve (or vice versa) then a transfer can be entered to reflect this movement. This has no effect on the bank accounts or any codes and will show only on the Reserves Report.
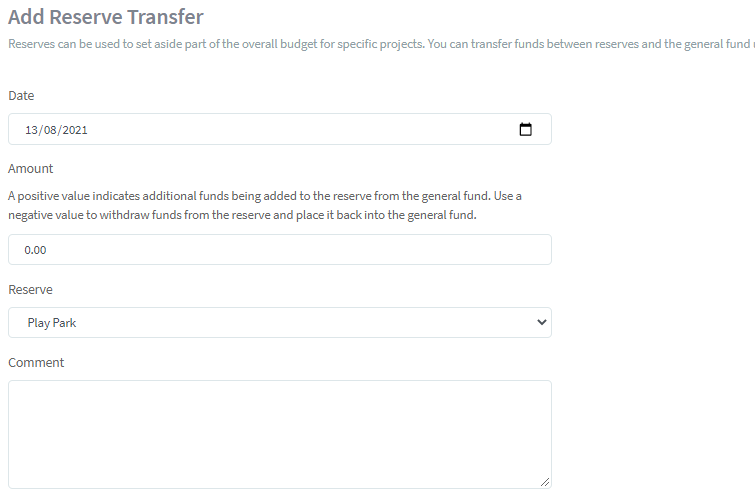
- Navigate to menu Reserves → Reserves Transfer "Add Transfer" in the top right-hand corner:
- Enter the date of the transfer.
- Enter the amount of the transfer. A positive amount will move money into the reserve. A negative amount will reduce the reserve balance and show the money back in the general fund.
- Select the reserve that the money is being transferred to (or from).
- A Comment can be added if required - e.g. if the money transferred relates to a specific part of the project.
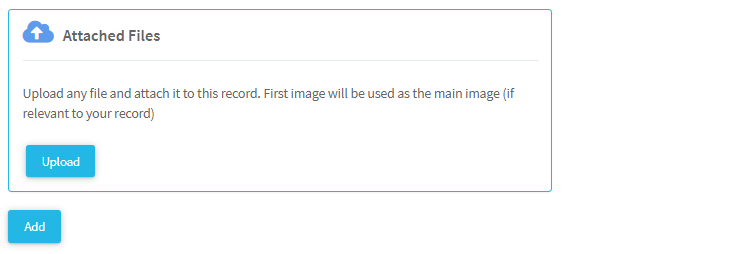
- Files can be attached to the transfer record if relevant. Click Upload, browse to the relevant document and select it. Repeat for any further files.
- Click Add to save the Transfer.
Editing/Deleting Reserve Transfers
The Reserves/Reserves Transfer menu option will display a list of all reserve transfers entered in the current financial year. To edit or delete a transfer click on More against the relevant transfer in the list and select either Edit or Delete. Edit will allow you to amend the details entered, once done click Save at the bottom. Selecting Delete will remove the reserve transfer from the list and delete the transfer amount from the reserve balance.
Reserve Transfers Report
This report (Reserves/Reserve Transfers Report) will list details of all the reserves transfers entered within the financial year. A filter can be applied to view transfers relating just to the reserve selected.
Reserve Balance Report
The report to view the current reserves balances can be accessed from any screen relating to reserves by clicking "View Report" or by selecting "Reserves Balance" under the Reserves menu option.
The report will list the reserves. along with the opening balances, the total transfers in/out, the total spend and receipts against the reserve and the resulting balance.
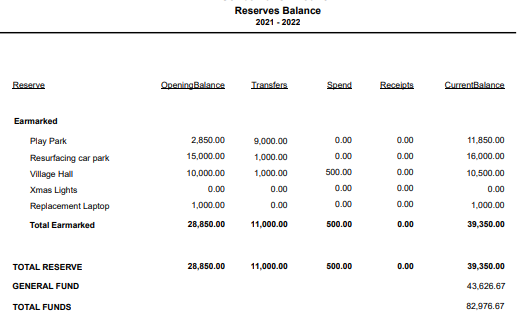
The total fund's figure at the bottom of the report is equal to the Box 7 figure as calculated on the Annual Return (under Year End). This is the total council funds available to be spent, and this report shows what element of that is held as reserves, and therefore what the resulting general fund is.
If you believe the total fund figure to be incorrect please ensure you have closed and copied over the previous financial year and if working in Income & Expenditure you have run 'Calculate' under Year End in order to update the Box 7 figure that the Reserves Balance report will refer to.
Closing Reserves
Once the Reserve is no longer required - i.e. all work has been completed and all entries (e.g. payments) have been recorded against it then it can be closed so that no further entries can be made against it. In order for you to close the Reserve it is necessary for the balance to be at zero. Therefore run the Reserves Balance report to check the balance and if necessary transfer the remaining balance back to the general fund (see Transfers above).
Then go to Setup/Reserves and click into the Reserve that is to be closed. Under Status select Complete to close the Reserve. This will no longer allow any entries/transfers etc. to be keyed against the Reserve. Ensure you select Save at the bottom of the screen to update this change.
Reserves at Year End
Reserves on the Balance Sheet (Income & Expenditure only)
The Reserves will automatically update to show on the balance sheet (previously manual amendments were required within the Year End menu). Therefore once you are ready to go through the Year End process it is necessary to run the Reserves Balance reports (as above) to ensure that the closing balances are correct. If they are not then make any required corrections/transfers so that the closing balances are as you want them to show on the Balance Sheet. Print/Save a copy of the report for future reference. When in the Year End menu ensure you have run 'Calculate' before running the Balance Sheet, especially if you have made any changes.
Copying over Reserves
Once you have confirmed your closing balances against your Reserves they can be copied over so that the Reserves appear in the new financial year with the correct opening balances. This means that any entries made in the new financial year will continue to update the Reserves balances automatically.
This is done by logging into the new financial year and going to Setup/Bring Forward Balances. If possible it makes sense to copy over all the balances listed here (Bank, VAT, Reserves, Assets and Borrowings) together as it is easier to keep track of what you have copied over. Therefore if at this point any of these balances are not confirmed or ready to copy over then either keep a record of what you have (and haven't) copied over or confirm the balances in the previous (current) year so that they can all be copied over together. More details on this can be found here.
6 of 9 found this article helpful.