Send bookings to your accounts
Scribe Bookings and Scribe Accounts will automatically be linked to one another, making it simple to invoice your customers for their bookings. There are two ways you can do this. If you'd like to send multiple bookings to your account all at once, head straight to option 2.
Option 1:
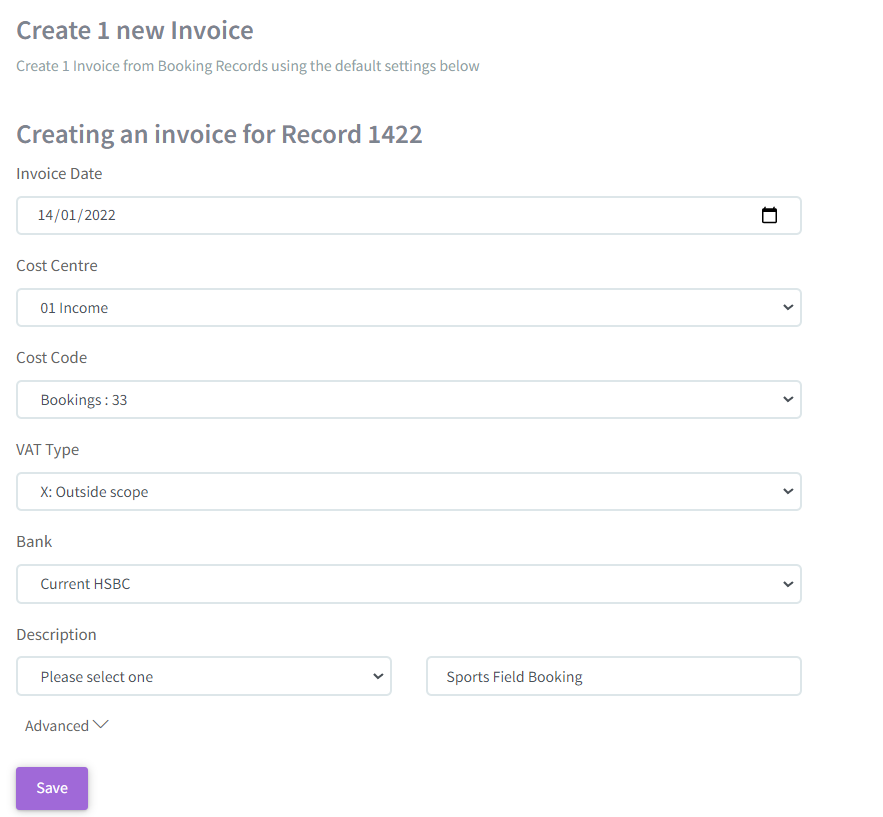
- Go to Bookings > click on the three dots next to the booking you wish to invoice and click on 'Send to Accounts'. Here you can allocate the booking to a cost centre and cost code, select the VAT type, bank account and add a description.
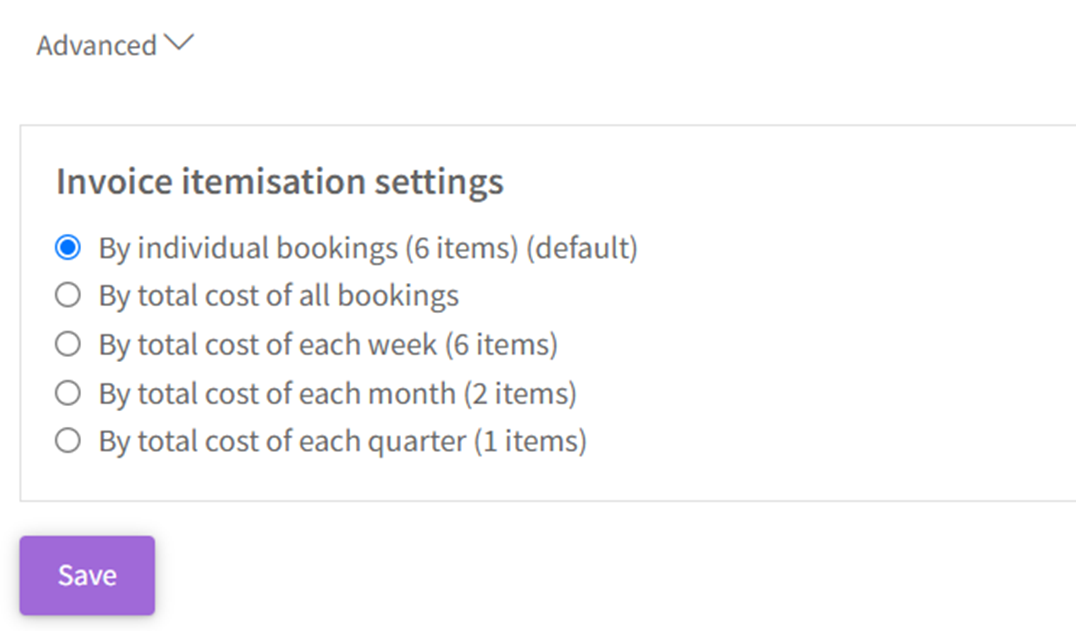
- Beneath Description, there is an "Advanced" Dropdown where if required you can make selections for invoice itemisation as below. The default option is set to 'By individual bookings'
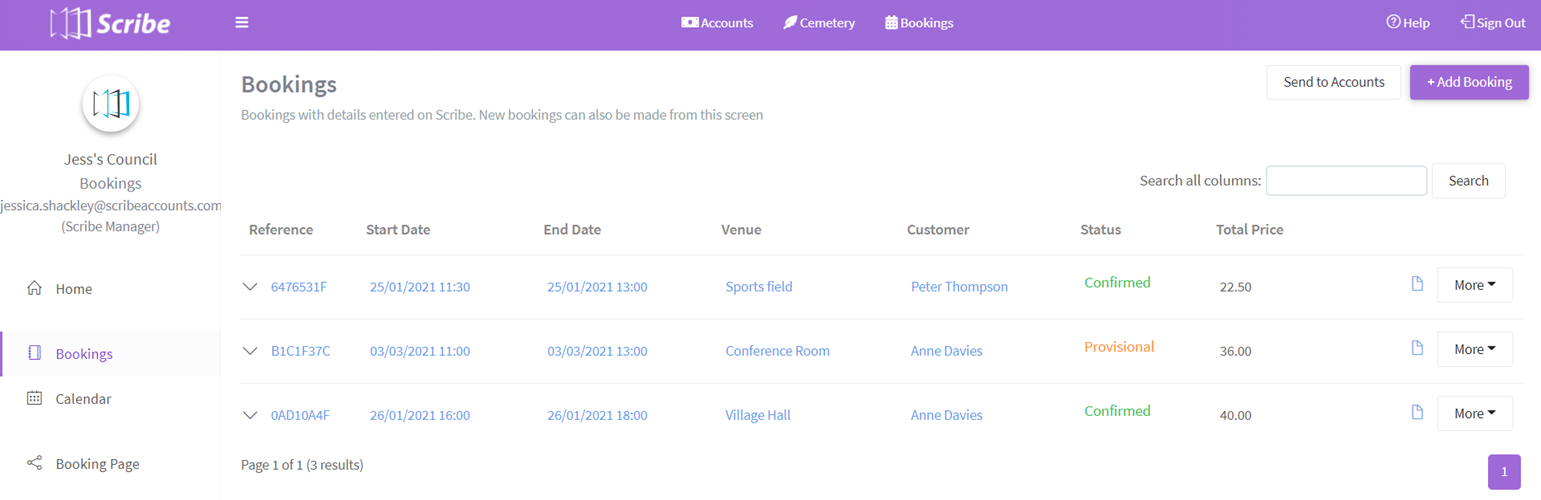
- Once saved, a blue icon will appear next to the booking invoiced, by clicking on this you'll be able to view the sales invoice in your accounts and download or share as you would any other sales invoice.
- When you've received payment, simply go to Transactions > Sales invoices > select 'More' and 'Convert to Receipt', this will now appear as a receipt transaction that you will be able to reconcile during your monthly reconciliation.
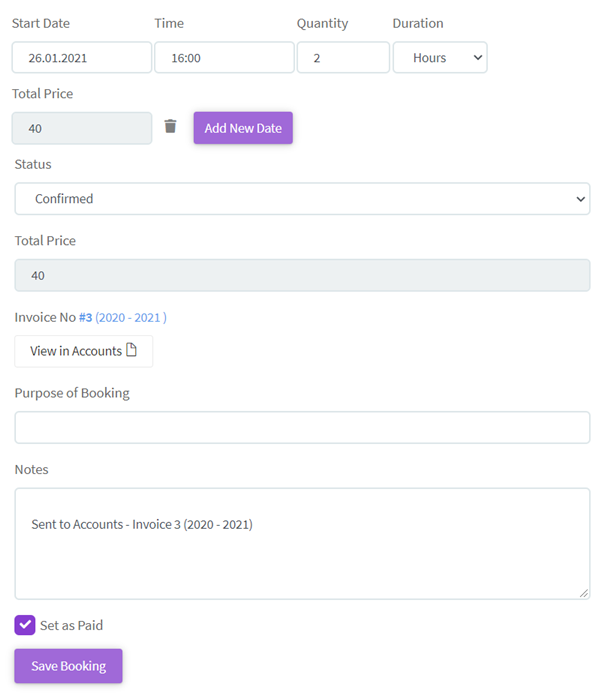
- When converted when you go back to Transactions > Sales invoices, you will see the status had changed from 'Outstanding' to 'Paid'. You can also select 'View in Bookings' where you will be able to change the status from 'Provisional' to 'Confirmed', if you haven't already, and set the booking as paid.

Option 2:
- To send multiple bookings to your account all at once, click on 'Actions' in the top right hand corner and send to accounts(you will need to be in default view to do this), and select the check box next to each booking you wish to invoice.
- Here you can allocate the bookings to a cost centre and cost code, select the VAT type, bank account and add a description. Note that the description you enter will be the same for all bookings, so if you are invoicing for multiple venues you may want to keep it generic rather than entering a specific venue in the description.
- Once saved, a blue icon will appear next to the bookings invoiced, by clicking on this you will be able to view the sales invoice in your accounts and download or share as you would any other sales invoice.
- When you have received payment, simply go to Transactions > Sales invoices > select 'More' > 'Convert to Receipt', this will now appear as a receipt transaction that you will be able to reconcile at the end of the month.
- If you go back to Transactions > Sales invoices, you will see the status has changed from 'Outstanding' to 'Paid'. You can also select 'View in Bookings' where you'll be able to change the status from 'Provisional' to 'Confirmed', if you have not already set the booking as paid.
Did you find this article helpful?
3 of 3 found this article helpful.
3 of 3 found this article helpful.
Can't find what you're looking for?Log a ticket