How to Create a Booking in Scribe
Now that you've completed the initial setup of your Scribe application, it's time to begin taking bookings. This guide will walk you through the process of creating and editing bookings.
Navigate to Bookings
Start by accessing your booking portal:
[Navigate to menu Bookings → Add Booking (click on the purple + symbol at the top of the page)
Basic / Customer Details
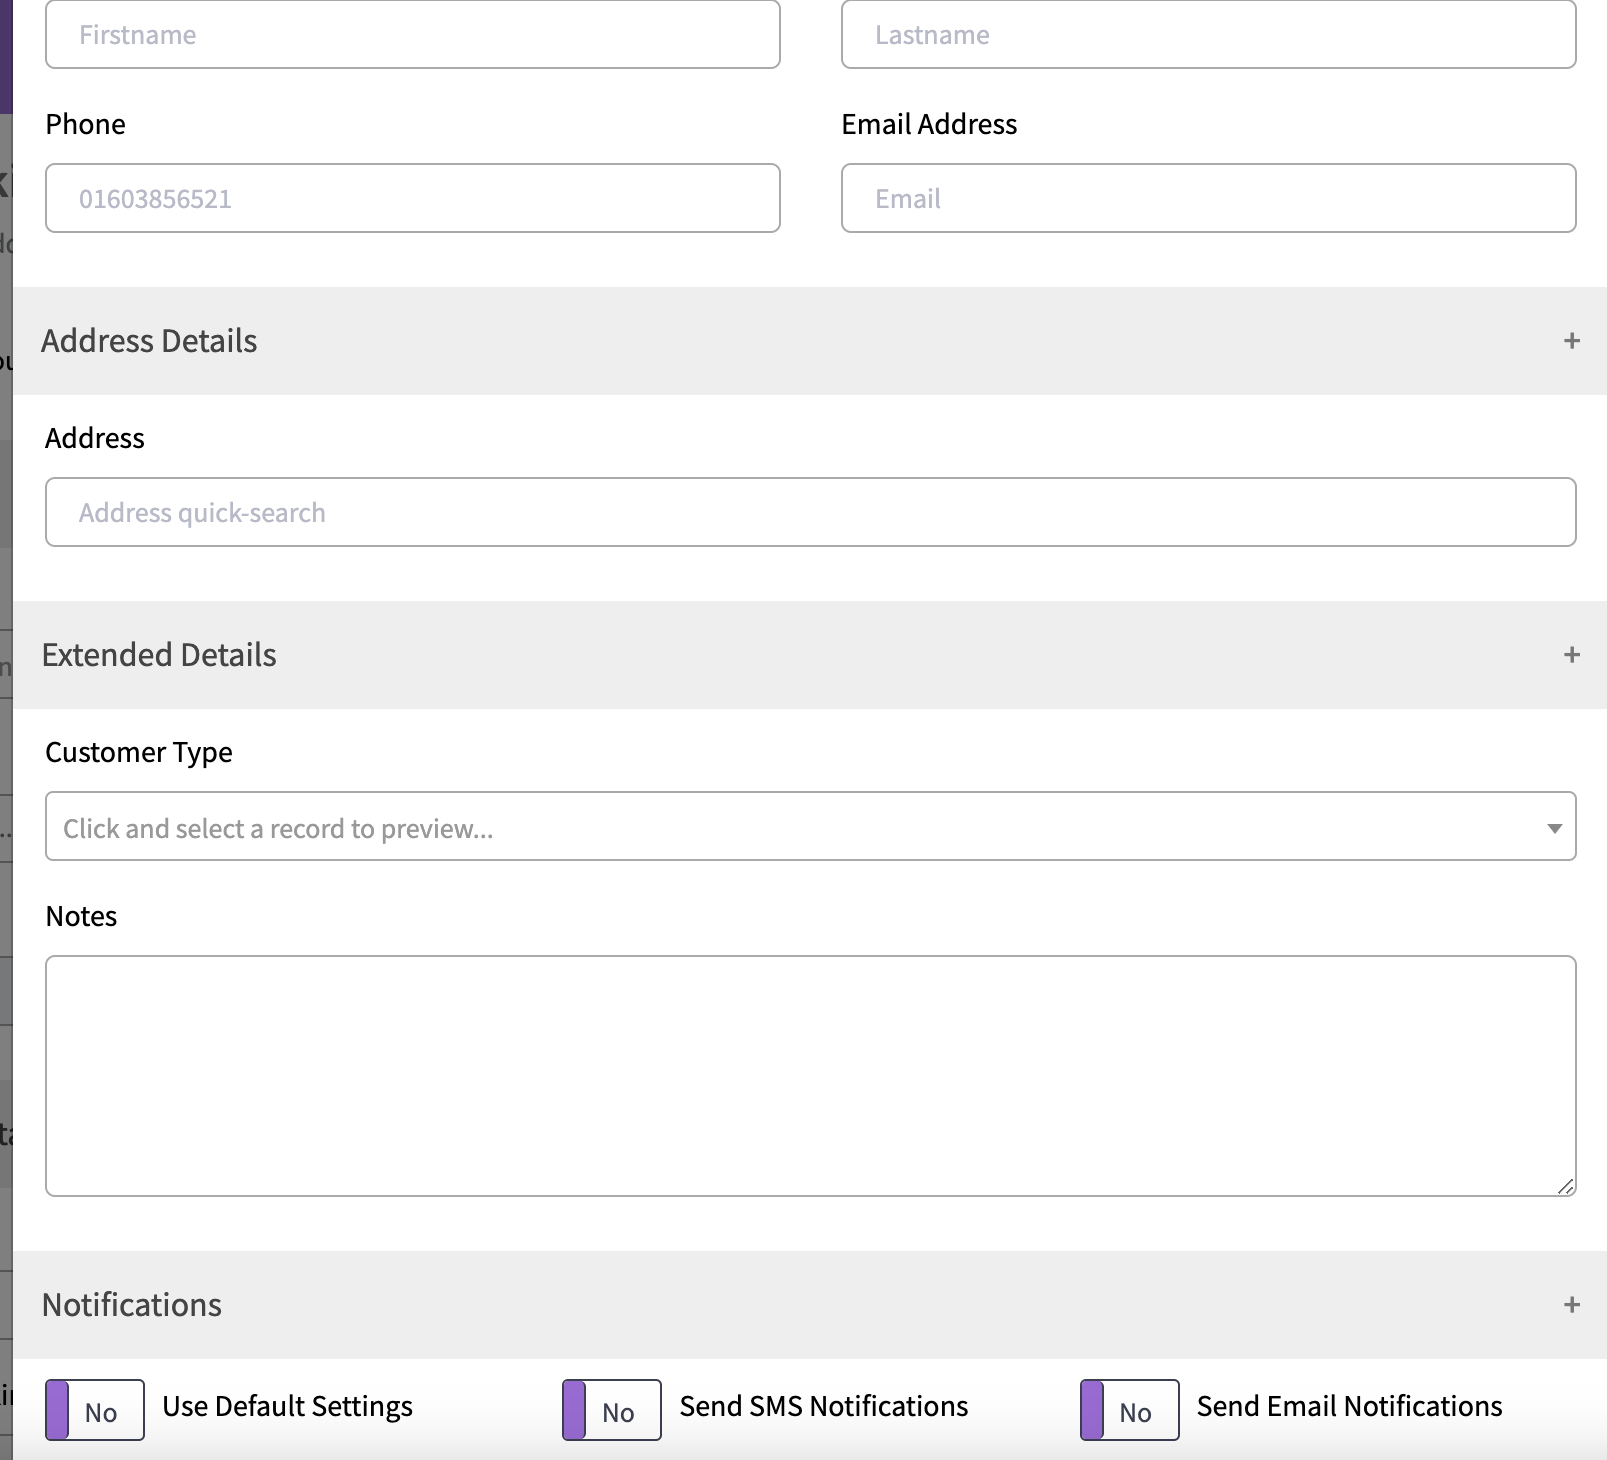
You have the choice to either select an existing customer from the drop-down or input a new one. For a new customer:
Click on the purple + icon and select 'Create new customer'.
A window will pop up allowing you to enter the customer's details.
Confirmation Preferences
Decide whether you'd like the customer to receive SMS and/or email confirmations.
- Toggle the relevant checkbox to switch between "Yes" and "No".
- Please note customers are sent reminders at 9am a day prior to their booking. They'll also be informed if there's a cancellation.
- Remember to click 'Save' after setting your preferences.
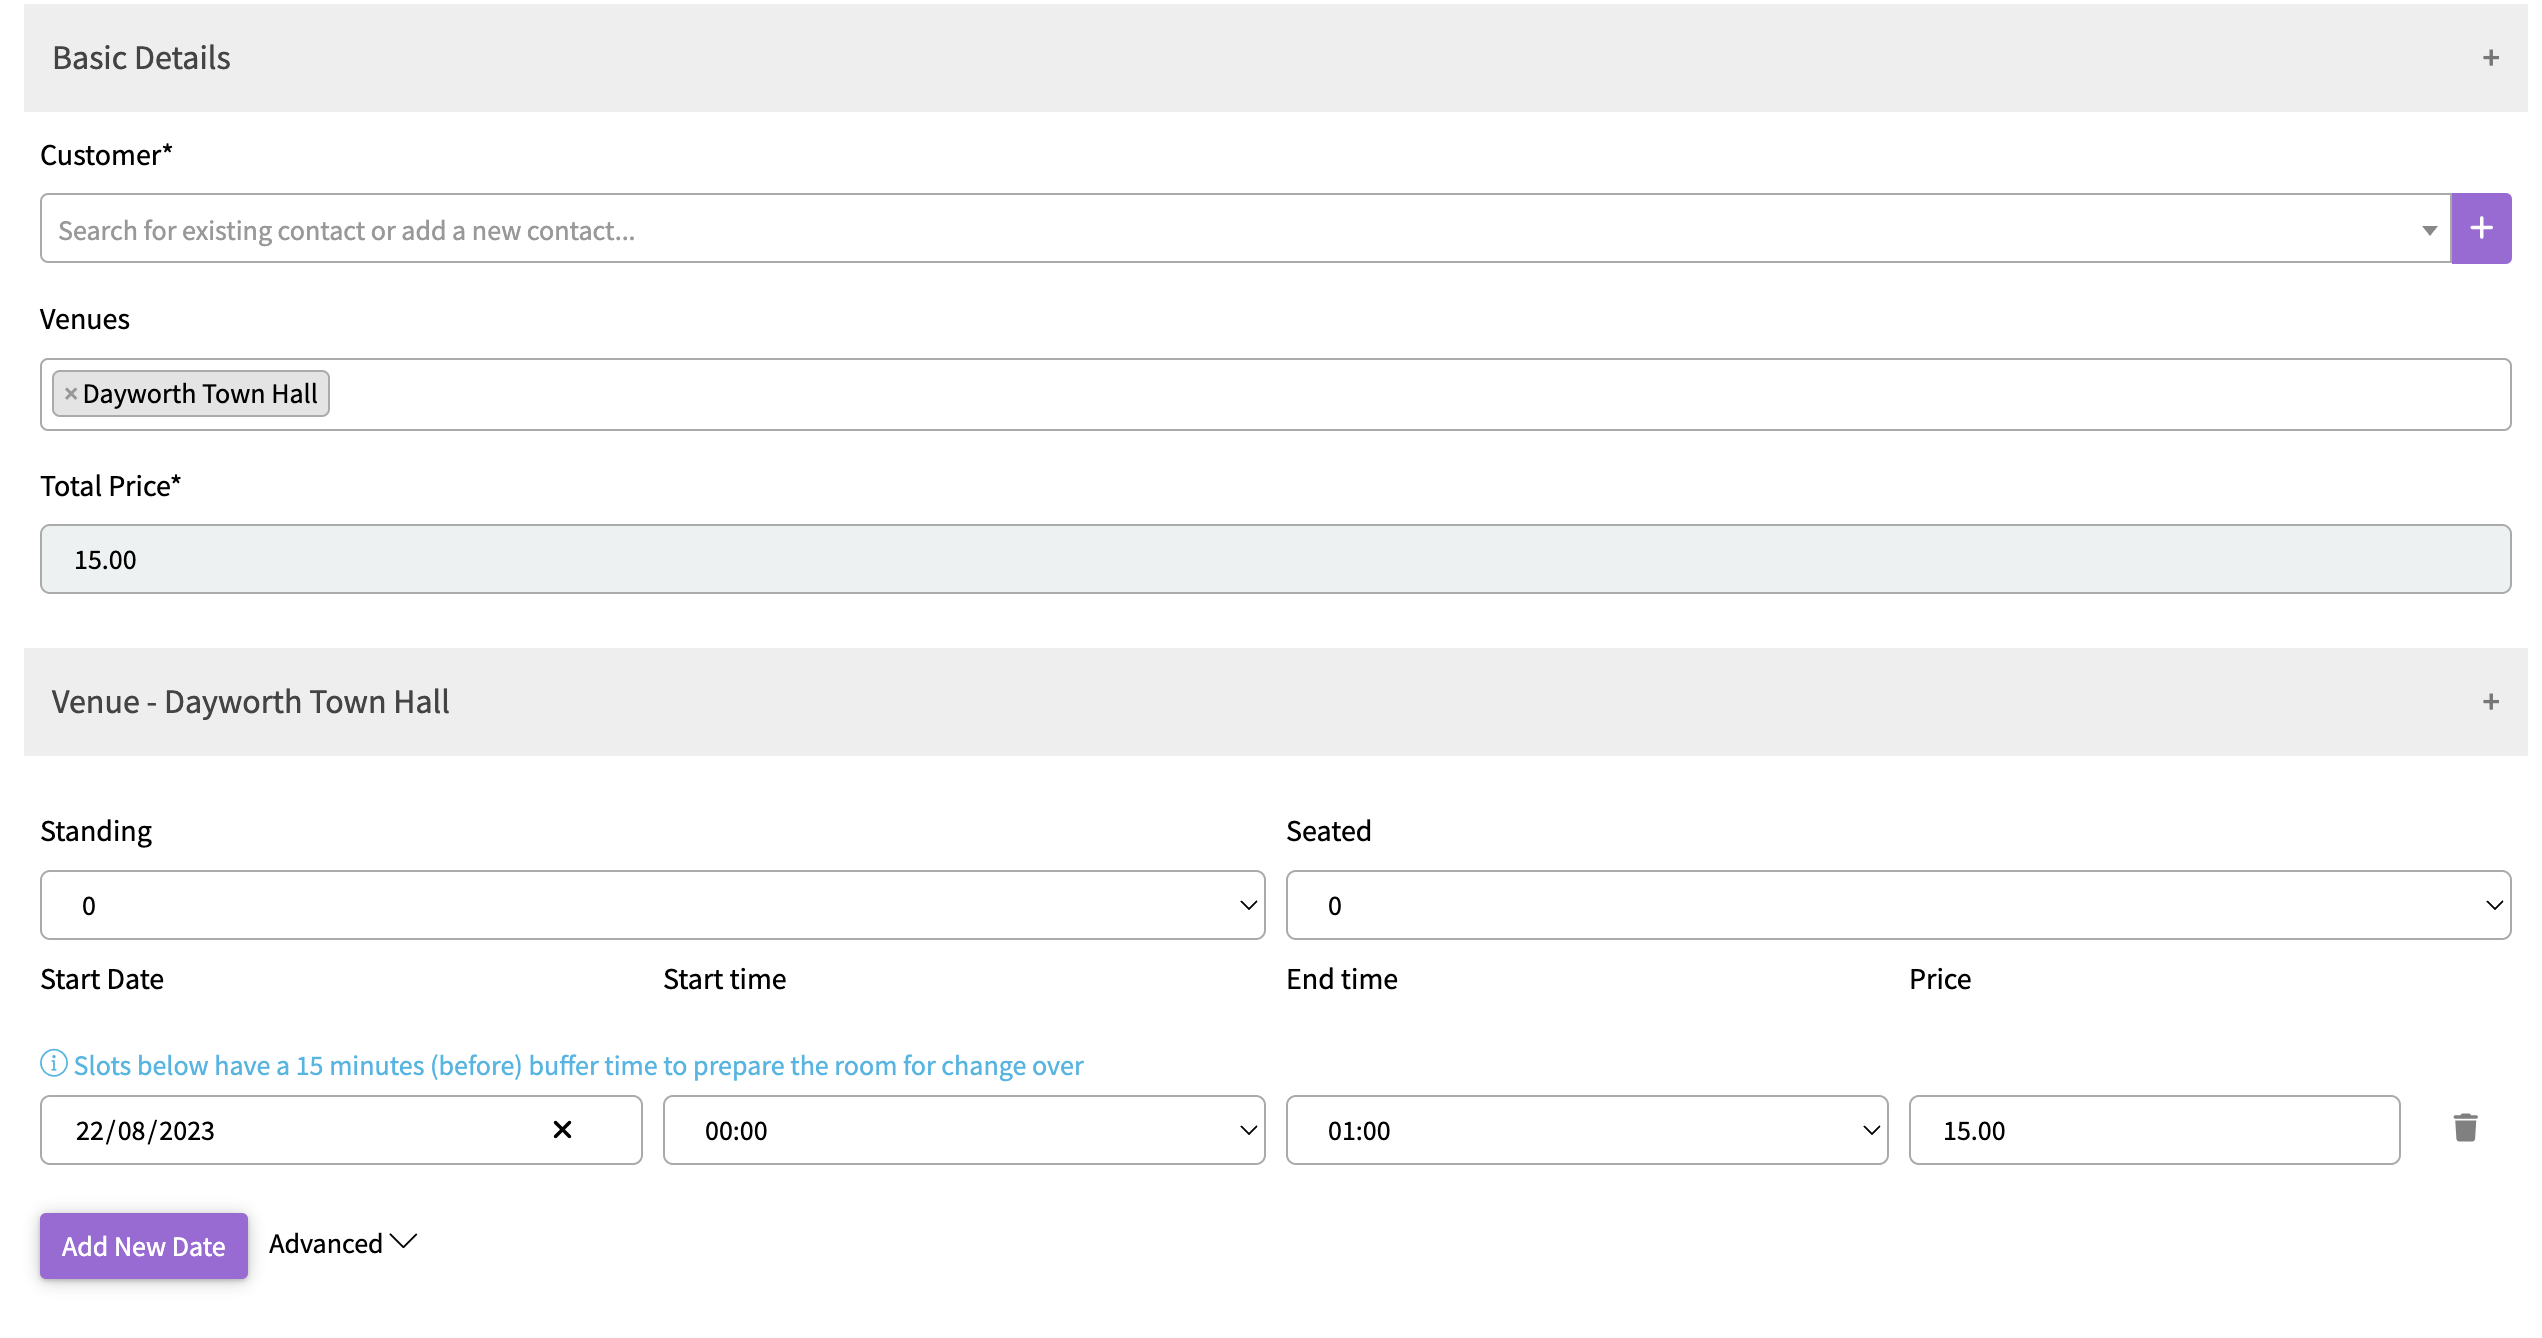
Venue and Time Details
Choose the required Venue or multiple Venues.
The system will automatically set the time slot based on the minimum duration set in your venue configuration.
Fill in the date, and specify the start and end times for each venue. The fee will adjust accordingly.
For additional dates, click "Add a new date" or for block bookings, use the advanced drop-down.
Block or Recurring Bookings
If you're setting up a recurring or block booking, click on the advanced drop-down arrow.
Choose your recurrence pattern and specify an end date.
Click on 'create events' to schedule the series of bookings.
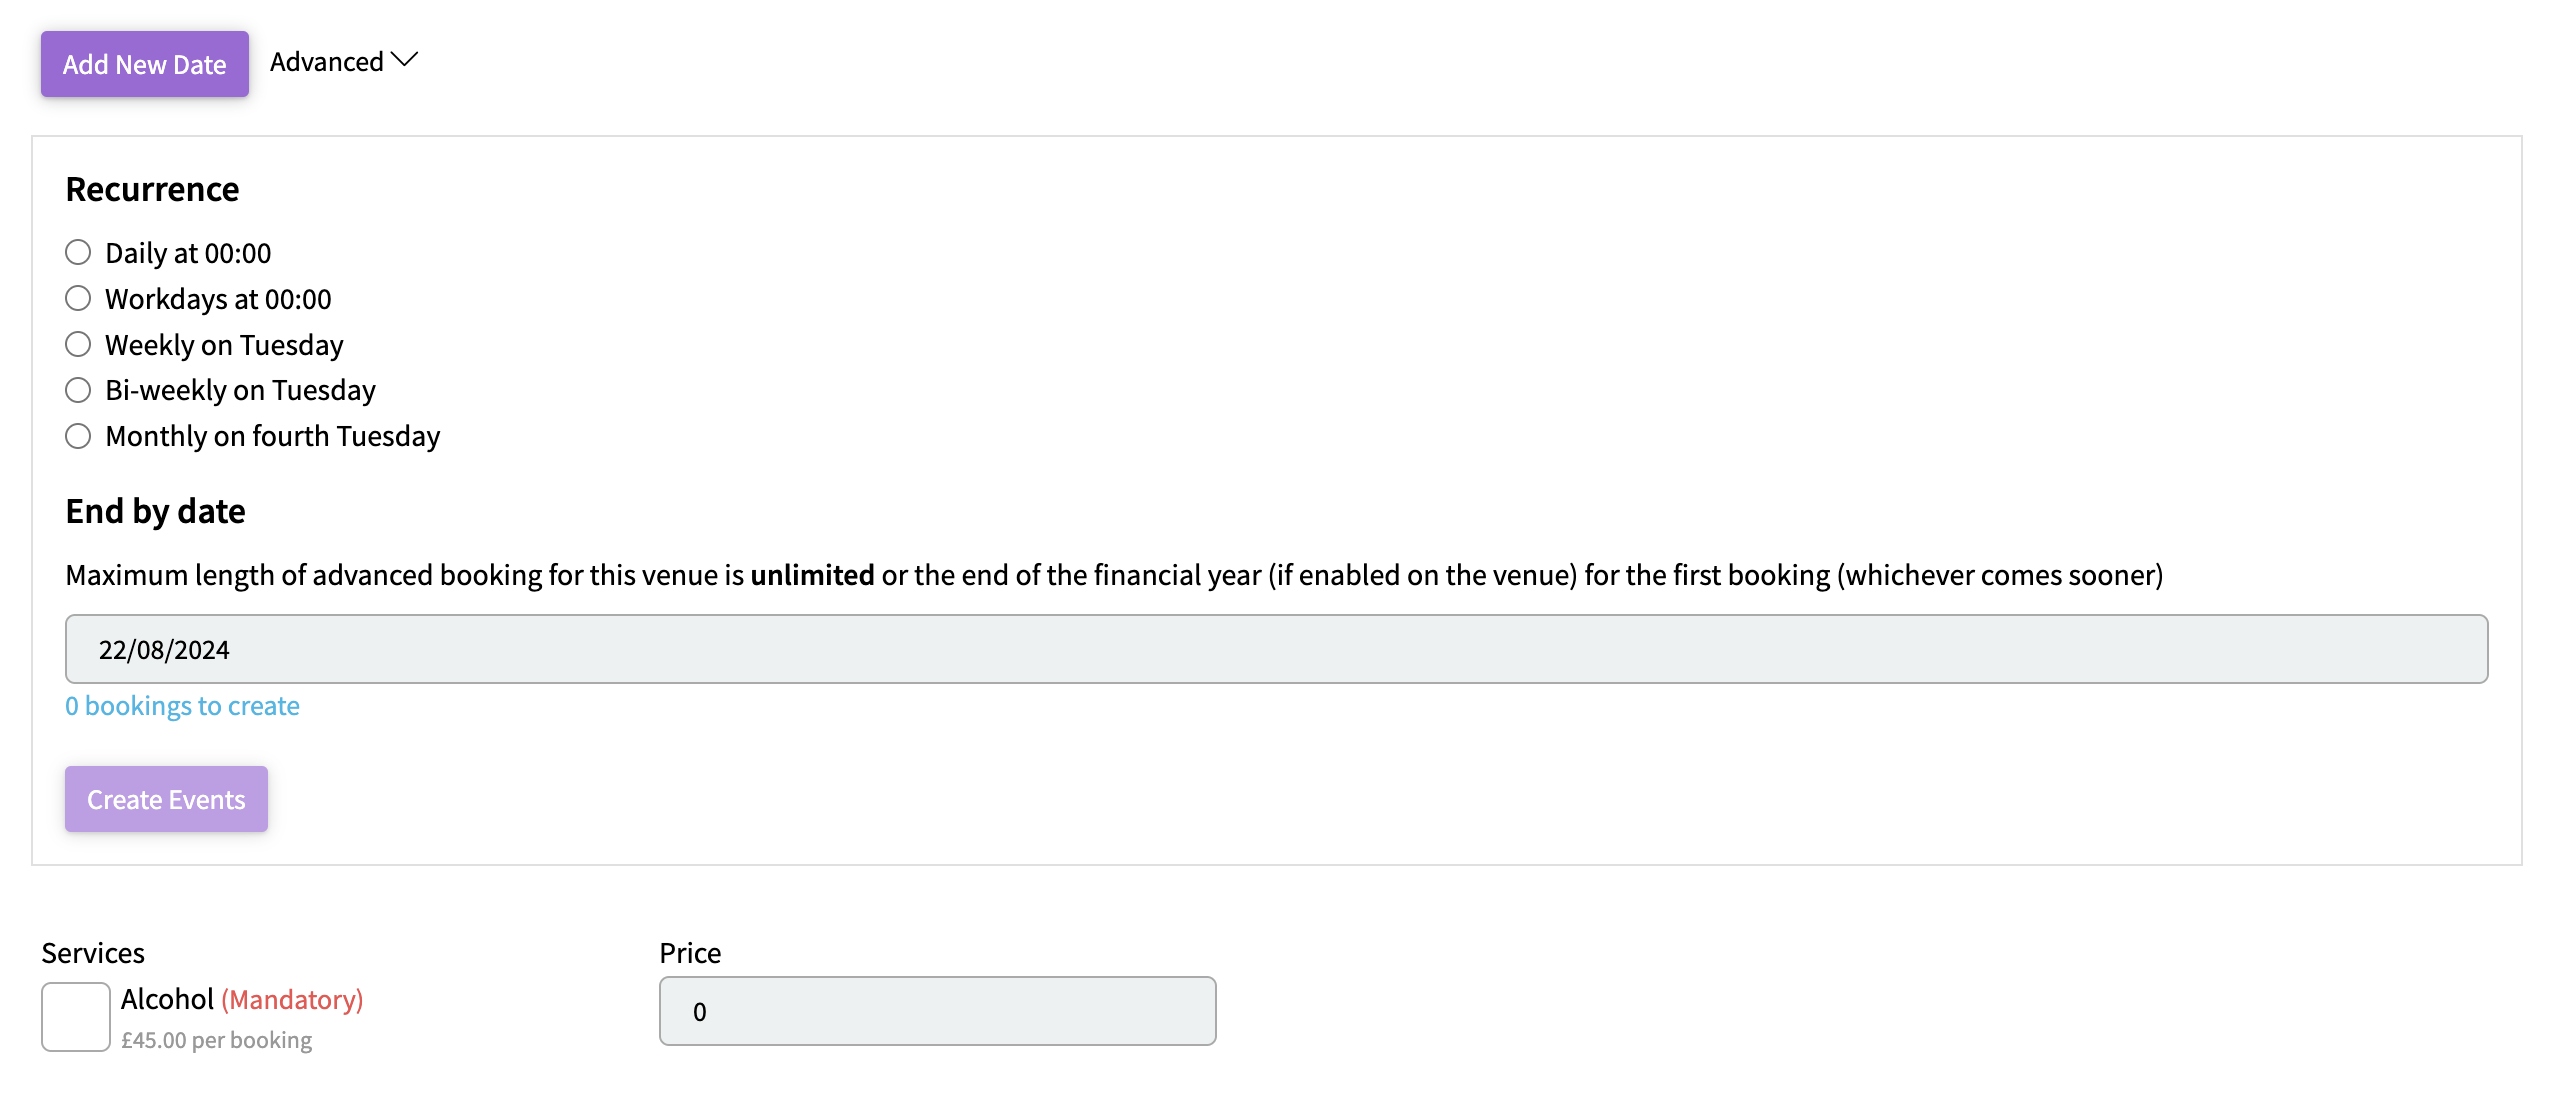
Additional Services and Details
Select any additional services relevant to the booking. Repeat this for each chosen venue.
You have the option to modify the status from provisional, to confirmed, or cancelled using the drop-down.
Fill in the booking's purpose, upload any related documents (e.g. a signed agreement), and jot down any other details in the notes section.
Operational notes will appear in the Caretaker's report, and customer notes will be included in the invoice.
Indicate if the booking has been paid by ticking the appropriate box.
Once you're satisfied with all details, click 'Save booking'.
How to Edit a Booking
If you ever need to modify a booking, Scribe makes it straightforward:
To access your bookings, Navigate to Menu > Bookings.
Locate the booking you'd like to amend. You can either click directly on the booking reference or click on the three vertical dots located to the far right of the booking.
From the emerging options, select 'Edit'. This will redirect you to a screen reminiscent of the 'Add Booking' interface, allowing for edits.
Deleting a Booking
1. To remove a booking, follow the steps for editing.
2. Instead of choosing 'Edit', select 'Delete' from the drop-down list.
1 of 3 found this article helpful.