Creating Tenant Records for the New Year
Renewing tenancy records for a new year in Scribe Allotments is a simple process, but it's important to take a few careful steps to ensure accuracy and avoid duplications. This guide walks you through reviewing and bulk renewing your tenant records.
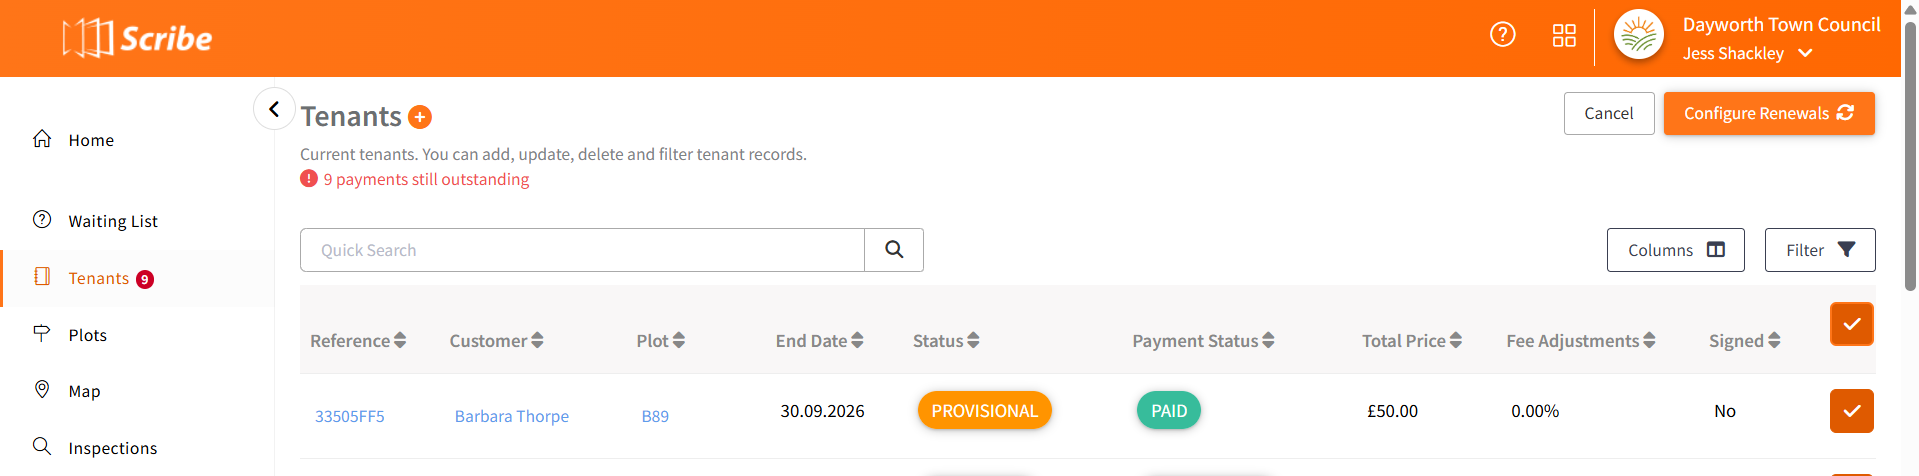
1. Navigate to the Tenants Section
To begin:
-
Navigate to Allotments → Tenants from the main menu on the left-hand side.
This will take you to a list of all current tenancy records.
2. Increase Records Per Page (Optional)
To help manage a large number of records:
-
Scroll to the bottom of the Tenants page.
-
Use the dropdown to increase the records per page — the maximum is 200.
This makes bulk operations easier to perform and review.
3. Review Tenancy Records Thoroughly
Before you initiate a bulk renewal:
-
Review every tenant record carefully.
-
Pay special attention to tenancies that were updated during the prior year.
-
Check for any tenants who may have had:
-
Different tenancy periods,
-
Changes in plot numbers,
-
Or terminations.
-
🔍 Use the Filter to Check Dates
To ensure no duplicate entries:
-
Use the Filter option (located above the records list) to search and segment records by tenancy date period.
-
Look out for any overlapping or duplicated entries.
🛑 Important: Do not proceed with bulk renewals unless you are certain there are no duplicate records.
4. Perform a Bulk Renewal
Once you're confident the records are correct:
-
In the top-right corner of the page, select Edit/Bulk Renewals.

5. Select Plot Holders to Renew
On the renewal screen:
-
You’ll see a list of existing tenants eligible for renewal.
✅ Quick Selection Tip:
-
Click the checkbox in the grey header row to select all plot holders.
-
Then, deselect any individual tenants who will not be renewing their tenancy.
- Click onto configure renewals
This is the fastest way to prepare the list for renewal.
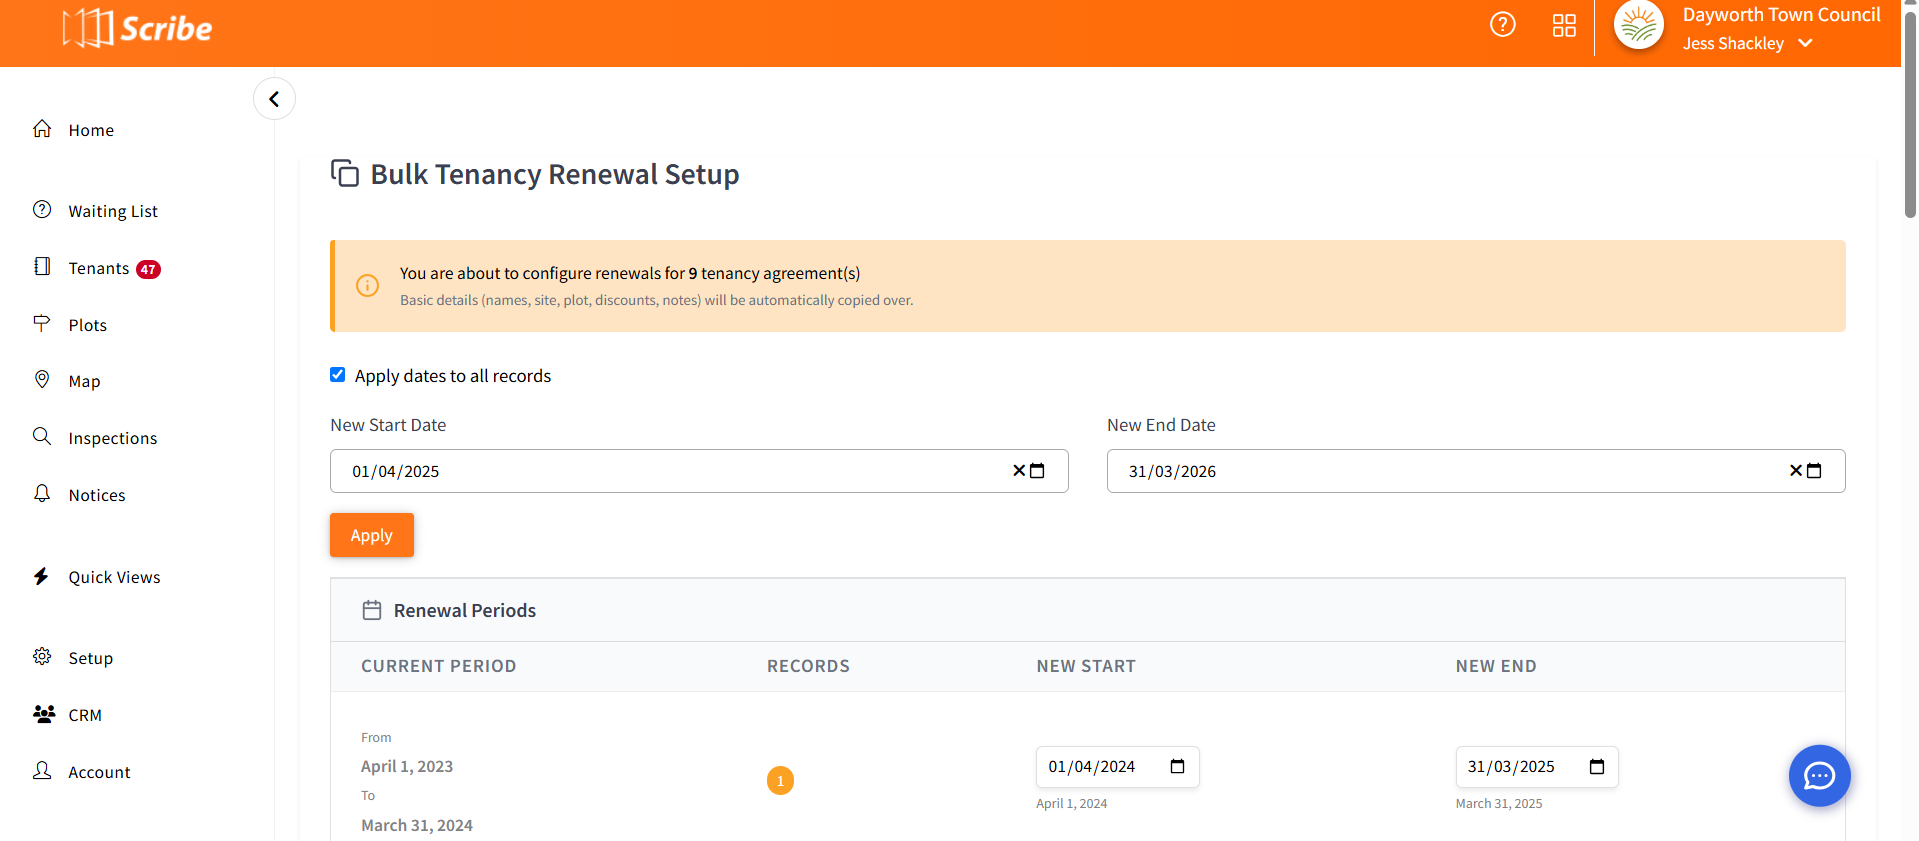
7. Apply Dates to All Records
To update dates in bulk:
-
Click ‘Apply to all records’ at the top of the date columns.
-
Enter the new Start Date and End Date for the upcoming tenancy period.
-
Click ‘Apply’ to populate the dates across all selected records.
📝 Editing Individual Records
If needed:
-
You can manually update tenancy dates for individual tenants directly within the list before finalising the renewals.
Before you create the tenancy records, you'll be asked to confirm several additional settings:
📁8. Data Transfer Options
-
Copy attachments over
Tick this if you want to transfer files (e.g. signed agreements, plot maps) from the old tenancy to the new record. -
Archive old records
Tick this to archive previous tenancy records. Archived records won’t appear in your active tenant list, but remain accessible within the system. -
Copy signed date from previous record
If the tenancy agreement’s signed date is stored in the old record and is still applicable, tick this to carry it over.
💷 Fee Calculation Options
-
Recalculate based on current plot fees
Tick this if you've updated plot rental fees for the new year — it ensures the new tenancy reflects the updated charges. -
Recalculate based on latest additional services
Tick this if there are updated or new additional services (e.g. water, sheds) associated with plots.
📌 Tenancy Status
-
By default, the tenancy status (e.g. Confirmed, Pending) will be copied from the previous record.
-
You may change this during the setup if required.
Once all details are confirmed:
-
Click Create to generate the new tenancy records (or see invoicing options below first)
You will be returned to the Tenants list where the newly created tenancies will be visible.

🧾 Invoicing Options
8. Send to Accounts
At the final step, you can:
-
Tick ‘Send to accounts’ to automatically generate invoices for all new tenancy records.
✅ Use this if you are happy with the invoice setup and ready to invoice tenants immediately.
❌ Do NOT use this if a tenant holds multiple plots and you wish to combine charges into a single invoice.
Instead, skip this step and use the standard bulk invoicing option later from Transactions → Sales Invoices.
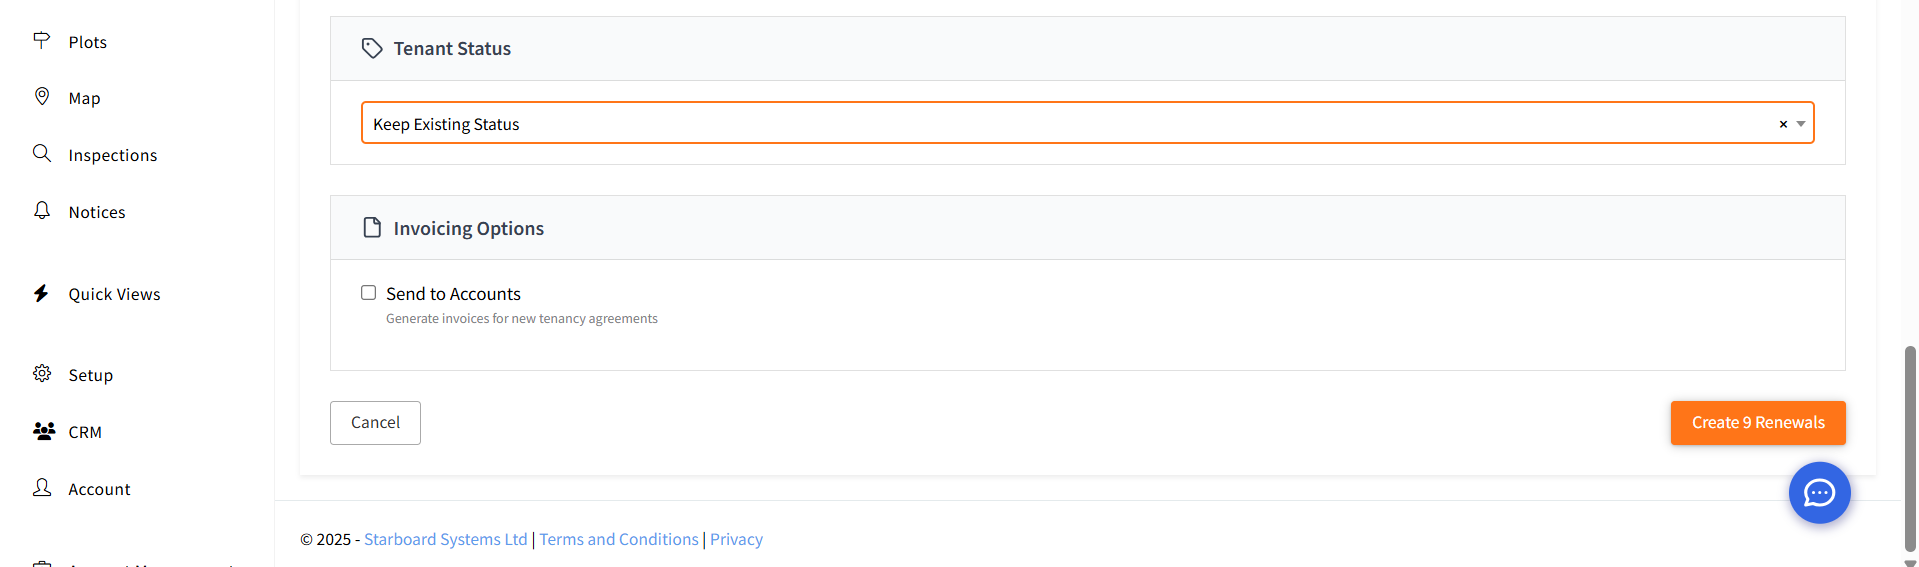
✅ Final Steps
Once all details and options are confirmed:
-
Click Create to finalise the new tenancy records.
You can view, manage, and adjust these records anytime via Allotments → Tenants.
💬 Need Help?
If you're unsure about when or how to invoice, or how to merge tenant charges, our support team is ready to help, contact us via [email protected]
1 of 1 found this article helpful.