What are Templates within Scribe Accounts
Templates in Scribe Accounts are predefined formats for both emails and downloadable documents. These templates allow users to create professional and consistent communications and records, including emails, invoices, letters, and more. By using templates, users can save time and effort, ensuring that documents and emails adhere to a standard format and layout.
There are two main types of templates available:
- Email Templates: Designed for creating and sending emails with predefined content and formatting. These are ideal for standardising communications with suppliers, customers, and other contacts.
- Downloadable Document Templates: These can be generated and downloaded as PDF or Word documents, either individually or in bulk. Use cases include generating invoices, reports, and letters for distribution or archival purposes. Document templates are particularly useful for customers who do not have email, allowing clerks to print and post documents.
Use Cases for Templates
- Email Templates: Streamline regular communications such as payment reminders and acknowledgements. Ensure consistency in messaging and branding across all email interactions.
- Downloadable Document Templates: Quickly produce standardised documents for official records, such as letters abd contracts etc.. Download these documents for distribution or to maintain accurate records. These templates are especially beneficial for customers without email, as clerks can print and post the documents.
Templates display the system templates, which you can edit and customise to suit your specific needs.
Watch this video and read on...
How to Edit a Template within Scribe Accounts
Navigate to menu CRM → Templates
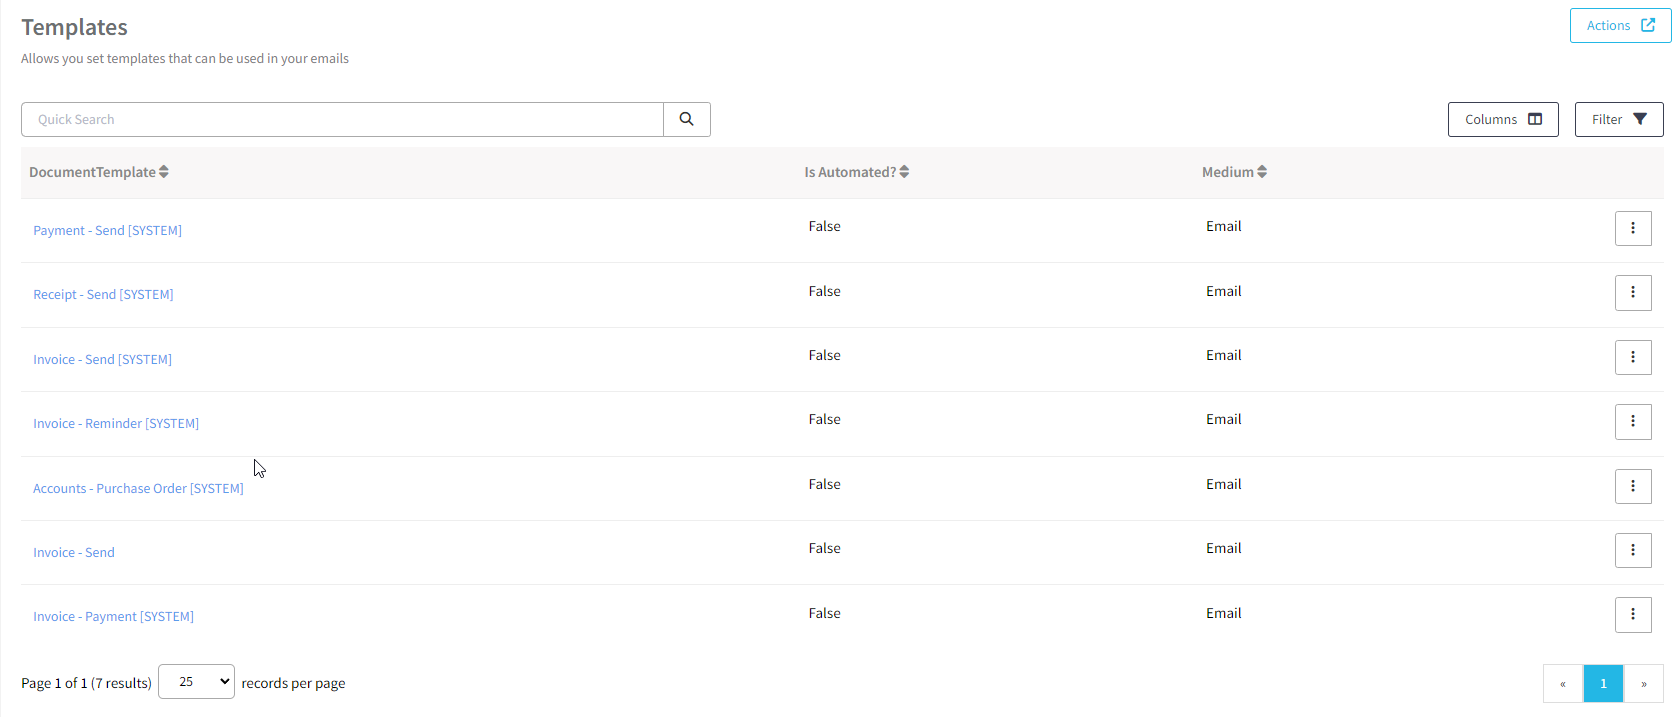
Click onto the three vertical dots next to the template you would like to edit and select "Edit"
Before making changes to a template, make sure to enter a new name for your template. Please note you CANNOT save changes to system templates, but once renamed then you can.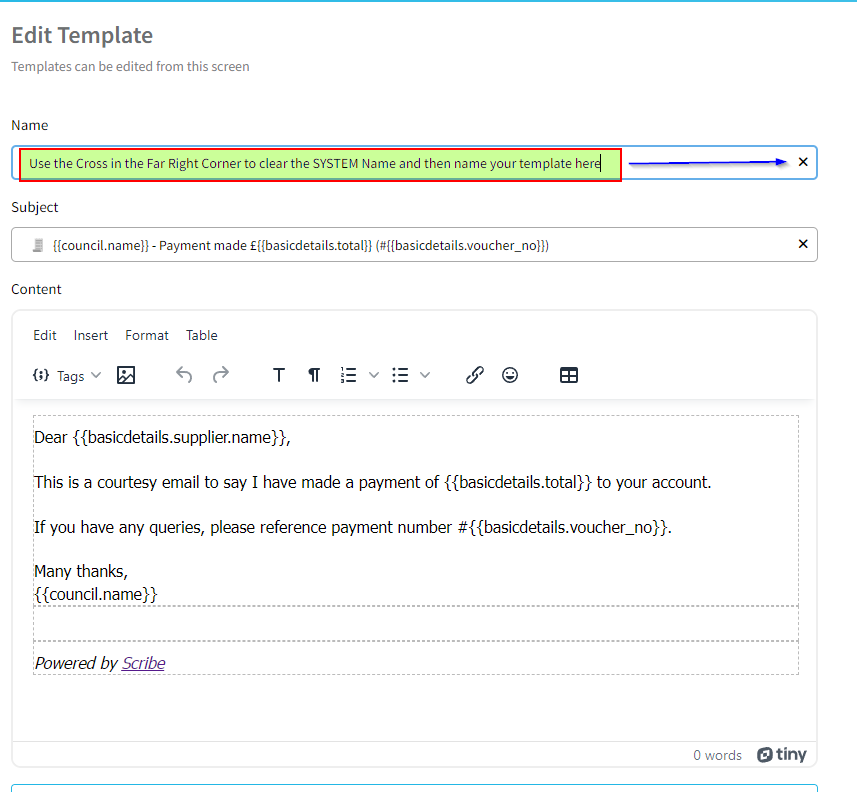
The template editor provides additional features to enhance your editing experience:
-
Rich-text editor: The editor includes a toolbar with standard document editing tools. You can format text, insert images, create tables, and more.
-
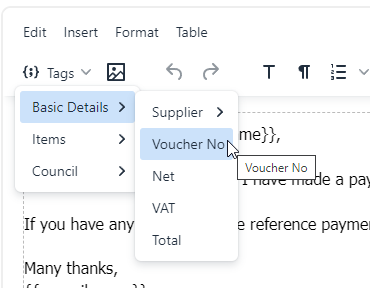
Merge tags: Templates support dynamic content, similar to mail merge in Microsoft Word. You have access to merge tags related to the record, such as invoice data, as well as general data like your council address (stored in your council profile).
-
Attached Files: You can upload any files you wish to include with the chosen template. For example, when customising the invoice template, you can choose to include or exclude a PDF copy of the invoice.
Rich-text editor
You will get access to a toolbar, which provides access to standard document editing tools, such as text formatting, inserting images, tables and more.


Merge tags
The templates support dynamic content, which is a bit like mail merge on Microsoft word. You have access to merge tags related to the record (like invoice data), and also general data, such as your council address (stored in your council profile).
Attached Files
You can upload any file that you may wish to have uploaded with the chosen template. If customising the invoice template then clicking onto the word "Invoice" allows you to include (solid blue) or Exclude (White with a blue bar) a pdf copy of the invoice with the template.


Previewing and Testing Template
When you are happy with the changes to your template, and have renamed the template select "Save" where you can then preview your results by selecting a record.
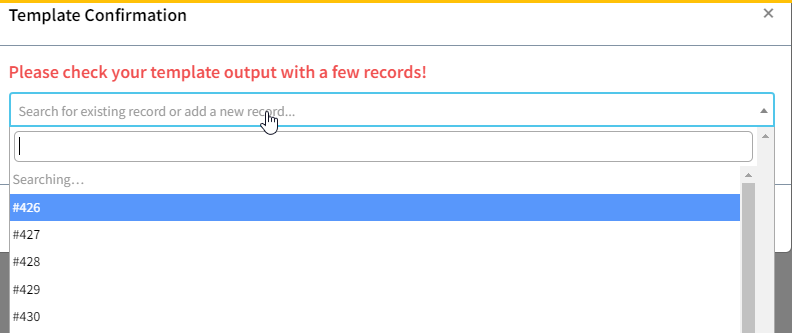
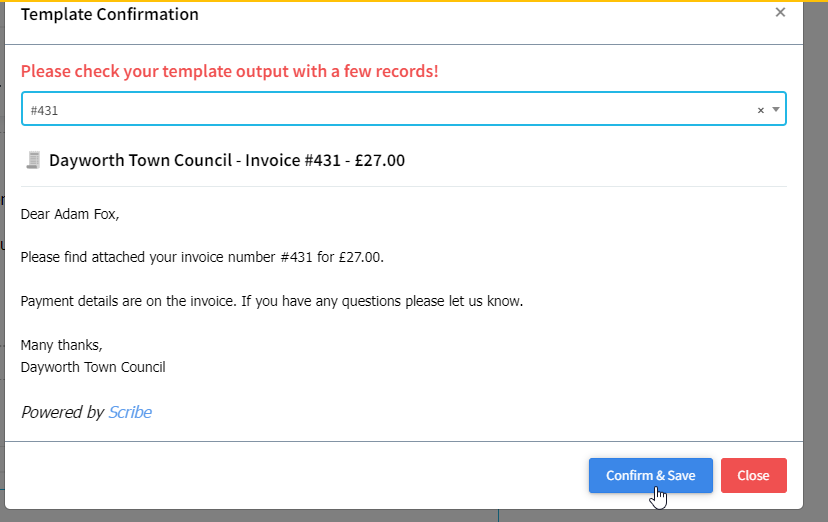
Select Confirm & Save or Close if you have further amendments to make.
Your template can then be selected from the drop-down menu when you send an email.
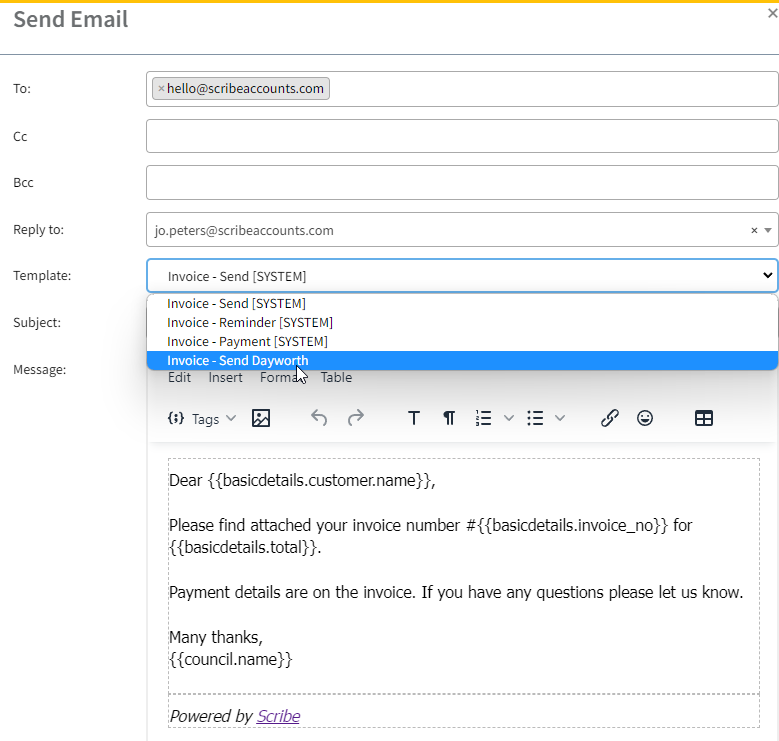
Note - Basic Customer Name - This prefils the name with either the "Supplier" or "First name, last name details". If you have BOTH a supplier and First Name Last name and ONLY wish to address messages to Dear First Name Last Name, then replace the basic customer name with both tags for First Name and Last Name 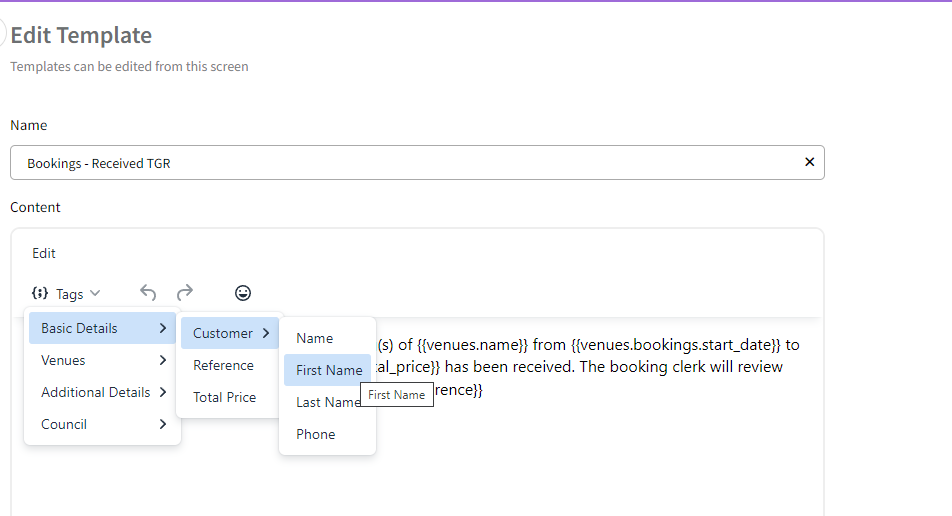
0 of 0 found this article helpful.